
Wood Glue
The Ultimate Guide to Using Wood Glue: Tips, Tricks, and Techniques for Strong Bonds
Woodworking projects often require more than just screws and nails to hold pieces together. Wood glue is one of the most essential and reliable adhesives in the world of woodworking. It’s versatile, easy to use, and can create incredibly strong bonds between wood pieces, making it indispensable for many projects. In this guide, we’ll dive into everything you need to know about wood glue—from choosing the right type to applying it effectively.
Why Use Wood Glue?
Wood glue is the unsung hero of many woodworking projects. While screws and nails might be the go-to for many, wood glue has a unique set of advantages that make it essential for creating strong, lasting connections.
-
Strong Bonds: Wood glue creates a chemical bond between the fibers of the wood, which can be stronger than the wood itself once the glue has cured. This bond is highly durable and doesn’t rely on mechanical fasteners.
-
Invisible Joints: Unlike screws or nails, which can leave visible marks or holes, wood glue is invisible when properly applied. This allows for cleaner, smoother joints and a more polished finish.
-
Versatility: Wood glue is suitable for almost any woodworking project, whether you’re assembling furniture, building cabinets, or repairing broken wood pieces.
-
Flexibility: It gives woodworkers the freedom to reposition pieces during assembly, providing extra time to adjust before the glue sets.
-
Preventing Splits: Wood glue helps to reinforce joints and prevent the wood from splitting, especially in delicate or thin pieces.
Types of Wood Glue
There are several different types of wood glue, each designed for specific applications. Here’s a breakdown of the most common ones:
-
PVA (Polyvinyl Acetate) Glue: This is the most common type of wood glue used in woodworking. It’s typically white or yellow and is water-based, making it easy to clean up with soap and water. PVA glue is ideal for indoor woodworking projects and creates a strong, durable bond for most types of wood.
- White PVA Glue: Best for lighter-colored woods, it dries clear and offers a strong bond.
- Yellow PVA Glue: Slightly stronger than white PVA, it’s more water-resistant and ideal for woodworking projects that may face some exposure to moisture.
-
Polyurethane Glue: This glue is known for its strength and moisture resistance. It expands as it dries, filling in gaps between surfaces, making it ideal for porous or uneven materials. Polyurethane glue is excellent for outdoor projects or projects that may be exposed to water or extreme conditions.
-
Epoxy Resin: Epoxy is a two-part adhesive that, when mixed, creates a very strong bond. It’s perfect for bonding difficult-to-glue materials, such as metal, glass, or certain plastics, in addition to wood. Epoxy is ideal for situations that require a very tough bond and for repairing cracks or holes in wood.
-
Hide Glue: A more traditional adhesive, hide glue is made from animal collagen. It’s not as commonly used in modern woodworking but is still favored for its ability to create reversible bonds, meaning joints can be disassembled later. It’s often used in antique furniture restoration and high-end woodworking projects.
-
Contact Cement: While not typically used for wood joints, contact cement is great for bonding wood to other surfaces like laminate or veneer. Once applied, the glue bonds immediately when the two surfaces make contact, making it ideal for situations that require an instant bond.
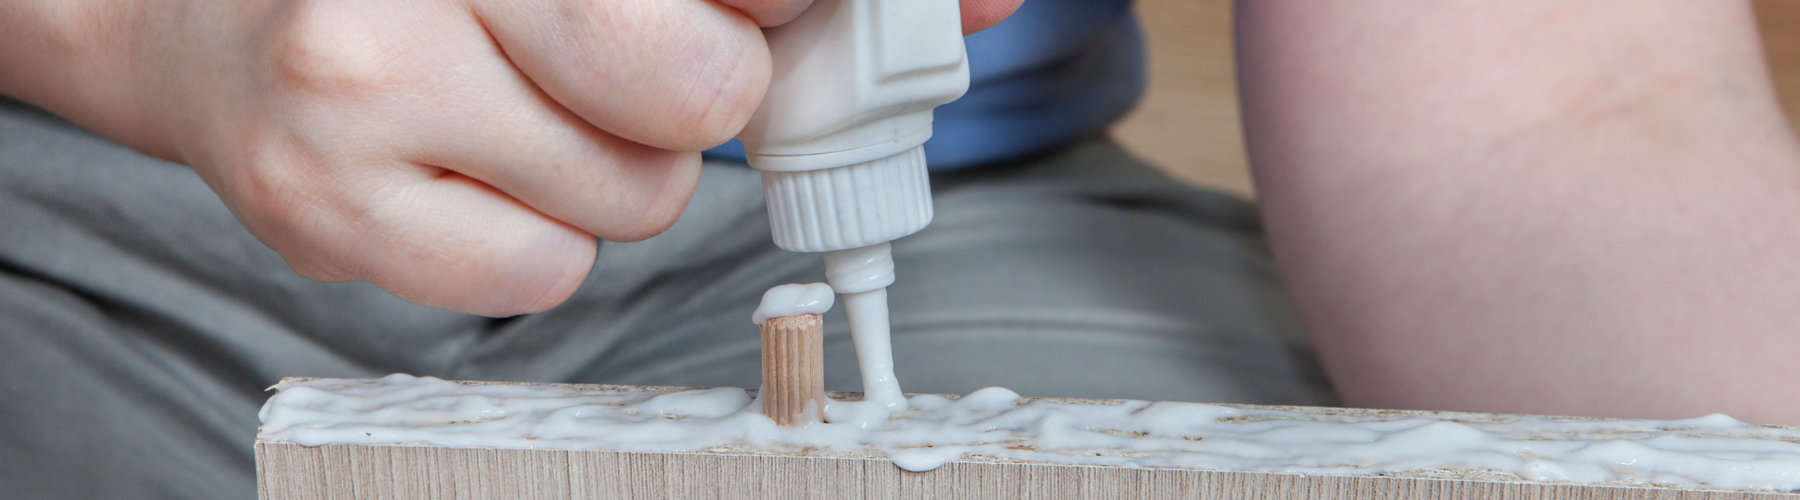
How to Apply Wood Glue Effectively
Now that you know what types of wood glue are available, let’s dive into how to apply it correctly for the best results:
-
Prepare the Wood: Ensure that the wood pieces you’re gluing are clean, dry, and free of dust or debris. If there are any rough spots, lightly sand them down to create a smoother surface for the glue to bond with.
-
Apply the Glue: Use a small brush, glue bottle, or glue spreader to apply a thin, even coat of glue to one of the surfaces you're joining. Avoid applying too much glue, as this can cause excessive squeeze-out when the pieces are clamped. You only need enough to cover the surface and create a strong bond.
-
Press the Pieces Together: Once you’ve applied the glue, press the two pieces together firmly. Make sure the edges are aligned properly, as the glue will begin to set relatively quickly, especially with faster-drying options like PVA glue.
-
Clamp the Joint: Use clamps to hold the pieces together while the glue dries. The clamping pressure should be firm but not excessive—too much pressure can squeeze out too much glue, while too little pressure may result in a weak bond. Clamp for the recommended time specified on the glue bottle (usually between 20 minutes to an hour).
-
Wipe Off Excess Glue: Before the glue has a chance to fully dry, use a damp cloth to wipe away any excess glue that squeezes out from the joint. If left to dry, the excess glue can create a mess and may be hard to remove without damaging the wood.
-
Allow Time to Cure: After clamping, let the glue cure fully before handling the project. Full curing time can vary depending on the type of glue, but it usually takes 24 hours for the bond to reach its maximum strength.
Tips for Using Wood Glue
-
Temperature Matters: Wood glue works best in moderate temperatures (around 50°F to 80°F, or 10°C to 27°C). Extreme heat or cold can affect the glue's effectiveness, making it either too runny or too slow to bond properly.
-
Use Proper Clamping Pressure: Too much pressure can cause glue to squeeze out, while too little can lead to weak bonds. Aim for enough pressure to hold the pieces together without creating a mess.
-
Don’t Overdo It: Applying too much glue can lead to messy joints and an excess of glue squeeze-out. You only need a thin layer on the bonding surface.
-
Test for Fit: Before gluing, always do a dry fit of the pieces to ensure they fit together properly. This allows you to make any adjustments before applying glue.
-
Store Properly: Always store wood glue in a cool, dry place. Ensure the cap is tightly sealed to prevent it from drying out.
-
Use a Glue Spreader for Even Coverage: If you’re working with large pieces or edges, consider using a glue spreader to ensure the glue is applied evenly and in the right amount.
Troubleshooting Common Wood Glue Problems
-
Excess Glue Squeeze-Out: If you have too much glue oozing from the joint, wipe it off with a damp cloth while it’s still wet. Once it dries, it can be difficult to remove without damaging the wood.
-
Weak Bond: If the bond isn’t strong, make sure you’ve used the correct type of glue for your material. Also, check that the surfaces were clean and properly clamped during drying.
-
Glue Not Drying: If the glue isn’t drying properly, ensure that the temperature is within the recommended range for the glue type you’re using. Extreme humidity or cold can delay curing times.
Final Thoughts
Wood glue is a simple yet powerful tool in any woodworker’s arsenal. Whether you’re assembling furniture, creating intricate joinery, or repairing a broken piece, understanding how to choose and apply wood glue can make a significant difference in the strength and appearance of your finished project. With the right glue and proper techniques, you can ensure your woodworking projects stay together for years to come. Happy gluing!